Conveyor Belt Cutting Tools
Getting a belt off the system cleanly and safely isn’t just another maintenance task. The quality of your cut directly affects splice life, tracking stability, and how quickly you return to service. In heavy-duty plants—mining, cement, terminals—poor cuts mean crooked splices, premature cleaner wear, and unplanned downtime. This guide breaks down Conveyor Belt Cutting Tools and the supporting gear and methods that produce square, repeatable cuts while keeping risk under control.
Key Takeaways
-
Use engineered restraint and LOTO before any cut; never rely on start/stop controls alone.
-
Match the cutting tool to belt construction and thickness; electric belt cutters improve consistency on medium-to-thick rubber belts.
-
Square the belt ends before splicing. A practical field target is on the order of ±1–2 mm over the belt width, validated against the chosen splicing system’s manual.
-
Supporting tools—engineered belt clamps, lifters, and squaring jigs—often determine the cut quality more than the blade itself.
Tool types and how they work
Manual knives and shears
Utility knives and heavy shears are common in light-duty settings and for trimming tasks. They’re inexpensive and portable, but they demand skill and strict controls. Without a squaring jig and belt clamps, manual tools are prone to wandering cuts and operator injuries. For thick rubber belts, multiple passes are required and blade sharpness becomes critical to avoid fraying the carcass.
Guided mechanical cutters and clamps
Guided cutters combine a clamping frame and a tracked blade that travels across the belt. The frame references the belt edges or a marked perpendicular, improving squareness and reducing effort. Typical models in this category (e.g., frame-guided transverse cutters) are rated for common mining and aggregates belt thickness ranges. They’re a strong option when electricity is impractical yet you need better accuracy than hand knives.
Electric belt cutters
Power-assisted electric cutters add a motorized cutting head and a guided feed. When set up correctly, they deliver consistent, square cuts with less operator force and a guarded blade path. Manufacturer instructions for popular models report rubber capacities roughly up to 25 mm on standard units and up to 50 mm on heavy-duty units, along with spring-loaded blade guards and sealed bearings that reduce push force and vibration. Always verify the specific model’s rated thickness and belt class in the instruction manual before use, and train operators on guard and depth settings described by the OEM. For design and safety features, see the details in the Flexco electric belt cutter instruction manual (2022).
Hydraulic and slitter systems
For very thick belts or longitudinal slitting jobs, hydraulic or captive systems are used. Slitters are common in shops for producing narrow strips from wide stock. Gas-powered or hydraulic steel-cord cutters also exist in specialized applications. These systems are less portable and require trained personnel and clear guarding plans.
Hot knives for light belts
PVC/PU light conveyor belts are frequently cut and squared on benches with thermoplastic tooling sets. Hot knives and bench cutters can produce clean edges for thermal joining methods. The keys are a rigid guide, accurate squaring, and careful heat control to avoid edge deformation.
Supporting tools for safety and precision
-
Engineered belt clamps restrain the belt during cutting and splicing. Heavy-duty clamp systems are rated in tonnes of clamping capacity and have defined width and thickness limits.
-
Belt lifters safely raise the belt off idlers without pry bars, providing working clearance and stable support.
-
Squaring tools and jigs reference the belt centerline or edges and translate that to a true perpendicular cut line.
-
Skivers and cover removal tools prepare the belt for mechanical fasteners or splice steps.
Match Conveyor Belt Cutting Tools to belt types and tasks
Textile EP or NN belts
For rubber-covered textile belts in the 8–20+ mm total thickness range, guided mechanical or electric belt cutters typically provide the best balance of cut quality and throughput. Manual knives may be used for thin covers or trimming, but they’re rarely the safest or most consistent choice for full-width cuts. For mechanical fasteners, add a skive to the covers per the fastener OEM. For terminology and designation context on textile belts, see ISO 14890 catalogue details.
Steel cord belts
Steel cord belts present more resistance and require cutters rated for the full thickness of the rubber matrix. Heavy-duty electric units may handle transverse cuts up to about 50 mm per certain vendor manuals, but the splice preparation itself must follow steel‑cord joint principles. For joint types, cord pitch, and edge width context, consult ISO 15236 listings and previews.
Thin PVC or PU belts
Light belts are often processed in-shop with bench tools. Use factory straightedge guides, hot knives, or bench cutters designed for thermoplastic belts. Squaring is still critical; thermal joining methods depend on clean, square edges.
Comparison table
Technical guidance and measurements
Squaring methods
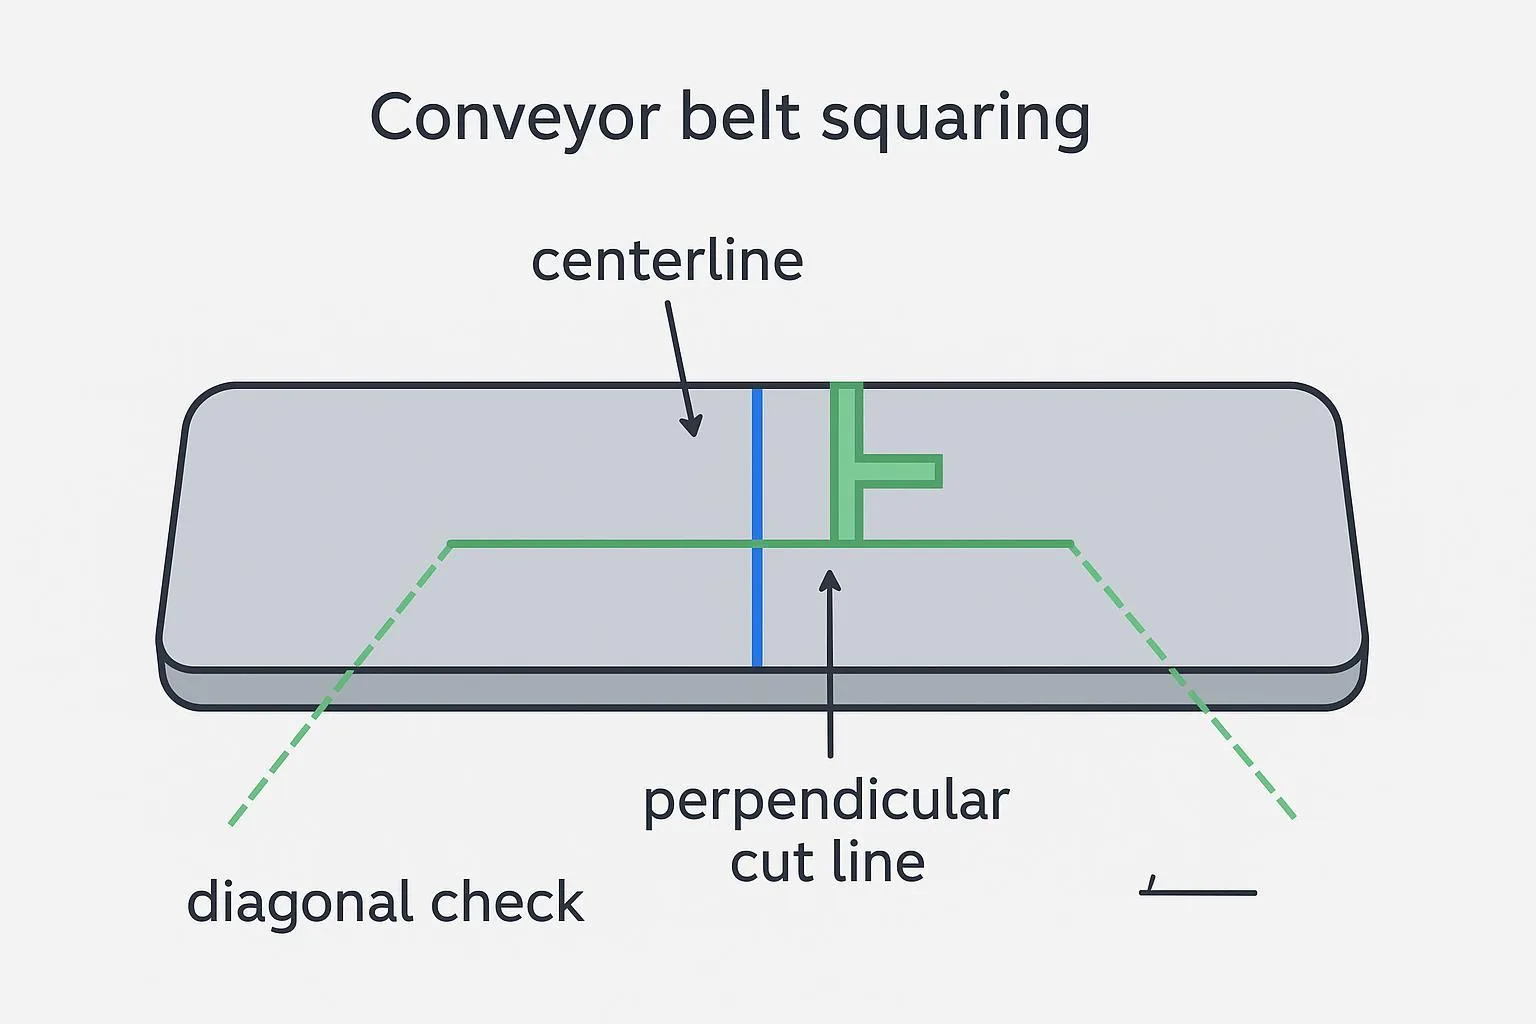
The simplest reliable approach is the centerline method:
-
Strike a true centerline along the belt by bisecting equal edge measurements at intervals.
-
Use a square or squaring jig to draw a perpendicular line at the cut station.
-
Check diagonals corner to corner; equal diagonals indicate a square end.
Tolerances and splice quality
Here’s the deal: splice life suffers when the ends aren’t square. A practical field target is around ±1–2 mm over the belt width for precision splices. Treat this as a working guideline and validate against the OEM splicing manual for your belt and joint type. Some jigs and templates specify their own tolerances—follow those first.
Tension context during handling
During shutdowns and post-splice commissioning, use the CEMA tension framework to avoid bad habits like over-tensioning to “force” tracking. Effective tension Te and slack-side tension for slip or sag determine minimum settings; then T1 = Te + T2. For a concise refresher on equations and definitions, see the Rulmeca technical explainer on belt tension.
Safety and risk controls
Pre job assessment
Conduct a task-specific risk assessment and a pre-use inspection of all tools and guards. Confirm the belt path is clear, and identify pinch points. Plan the restraint strategy: relieve tension at the take-up or storage, anchor engineered clamps to substantial structures at 90 degrees to belt travel, and tie off in line with travel. Keep non-essential personnel clear of the work area. Mining-focused guidance emphasizes blocking against motion and specific clamp anchoring practices; see the highlights in CORE Safety’s alert on belt conveyor work.
LOTO and PPE checklist
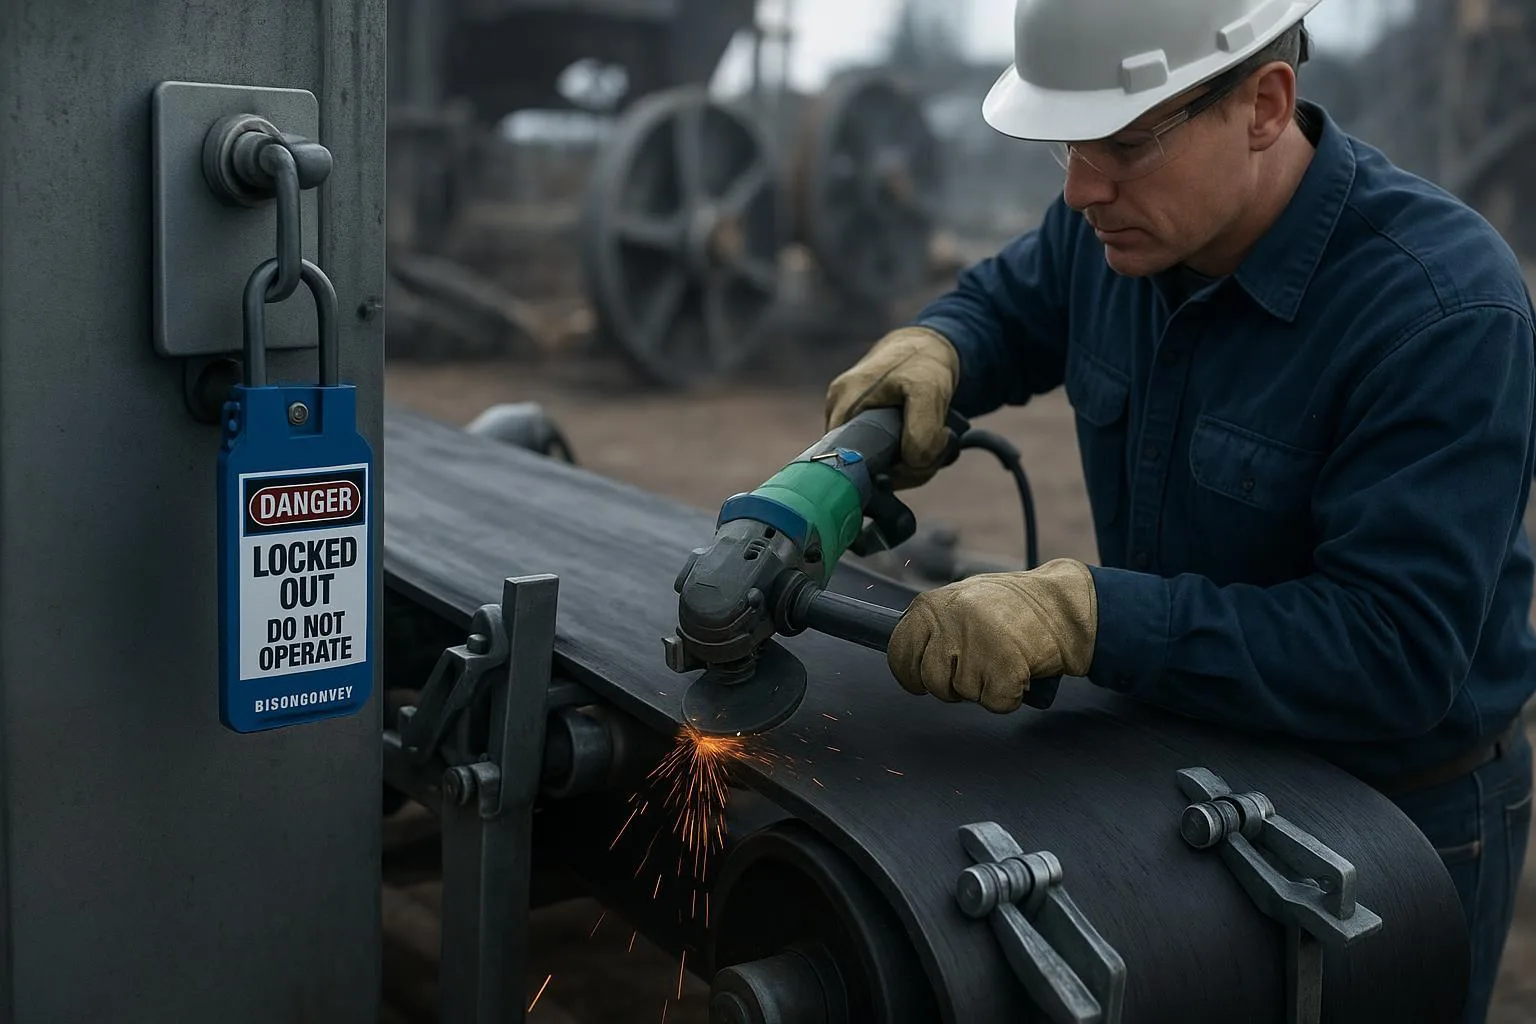
Cutting is servicing and maintenance. Apply a full lockout/tagout sequence per your site program: preparation, shutdown, isolation, device application, stored-energy release, and verification of isolation. Use personal, standardized locks and tags. Verify zero energy at the drive and take-up. Where required, block or chock the belt to prevent motion. PPE typically includes cut-resistant gloves, eye protection, hard hats, and protective footwear. For program structure, training, and inspection requirements, see OSHA’s Control of Hazardous Energy overview.
Safe belt cutting procedures
Safe belt cutting procedure with manual and guided tools
-
Elevate the belt using a lifter and stabilize the strand on supports.
-
Install engineered clamps, square the cut line, and mark it boldly.
-
If using a knife, make multiple controlled passes with a sharp blade against a rigid guide. Keep hands clear of the line of cut.
-
If using a guided mechanical cutter, set the frame per the jig instructions, check clamping torque if specified, and advance the blade evenly.
-
After the cut, deburr or clean the edge and re-check squareness with diagonals.
With electric cutters
-
Confirm the model’s thickness and belt class capacity in the OEM instructions. Inspect the guard and bearings; refer to the Flexco electric belt cutter manual for examples of guard setup and capacity ranges.
-
Set the depth and guard per the manual. Stage corded power safely or check battery charge for cordless units.
-
Feed steadily along the guide. Sealed bearings reduce push force; don’t force the tool.
-
Maintain body position clear of the blade travel. Keep bystanders at a safe distance.
-
Complete the cut and secure both ends with clamps before releasing restraint.
Post cut checks and splice prep
-
Verify squareness by diagonal measurement and with a square.
-
Check edge integrity—no frayed plies or cover tears. If present, trim minimally to restore a clean edge.
-
Prepare for the splice method: skive, buff, clean, and cement per the fastener or vulcanizing system’s instructions. For downstream cleaner compatibility after splicing, select blade types appropriate to your splice per the CEMA 576 application class framework. An overview of the classification method is provided by Martin Engineering’s explainer of CEMA 576.
Maintenance and troubleshooting
Keep blades sharp and replace them per the OEM’s interval or when fraying appears. Maintain guards and bearings, and clean or lubricate surfaces if specified. Store cutters in protective cases to prevent damage and dulling.
Common issues and fixes:
-
Crooked cut: Inadequate squaring reference or belt not securely clamped. Fix by re-marking with a centerline and perpendicular and using a guided frame.
-
Frayed carcass: Dull blade or improper blade geometry. Replace the blade and reduce feed force.
-
Incomplete penetration: Belt thickness exceeds the tool’s rating or depth set too shallow. Verify capacity and adjust or step up to a higher-capacity unit.
Procurement and specification appendix
Capability ranges and key fields
When writing a purchase spec or RFQ for Conveyor Belt Cutting Tools, include maximum belt thickness capability across rubber and PVC/PU classes, maximum width handled or how the tool accommodates width, power type and voltage or cordless platform, safety features such as spring-loaded guards and shields, feed design and portability, consumables and spares, training and documentation availability, and service support and parts lead times.
Based on a common vendor family of electric belt cutters, expect rubber capacity ranges on the order of 25–50 mm with guarded blades and sealed bearings, and PVC capabilities specified by belt rating ranges. Always cite the specific model’s data sheet in your RFQ and acceptance criteria.
TCO levers and spares
Total cost of ownership depends on setup and training as much as tool price. Faster, repeatable cuts can reduce outage time; guarded, guided systems reduce laceration and musculoskeletal risk compared with open knives; blade materials and coatings influence replacement intervals; and compatibility with your site’s cordless platform can simplify batteries and chargers. Maintain a small spares kit with blades, guards, and key wear parts, and keep a maintenance log for your cutter fleet.
Real world scenarios
-
Mining shutdown splice prep: On a 1600 mm wide EP belt at 16 mm thickness, a guided electric cutter and T-rated clamps delivered a single-pass square cut. The crew verified squareness by diagonals, then prepped a cold splice per the splice kit instructions. Cleaner compatibility was checked using the application class framework before restart.
-
Cement plant changeout: A 1200 mm belt with a 20 mm total thickness needed removal in a tight window. A guided mechanical cutter with a rigid jig was chosen due to limited power availability. Additional passes ensured clean penetration, and the belt ends were trimmed to tolerance.
-
Logistics terminal light-belt service: Thin PVC belts were cut on a bench using a hot-knife system and a factory straightedge. Squareness was verified before a thermal join. The result was a clean tracking belt with minimal run-in adjustments.
Further reading and references
-
OSHA program structure, training, and inspection requirements are summarized in the Control of Hazardous Energy LOTO overview (2025).
-
Mining-focused blocking and clamp anchoring guidance appears in CORE Safety’s alert on working around belt conveyors (2023).
-
Textile belt terminology and designation context: ISO 14890 catalogue page (2013 listing).
-
Steel cord design and joint context: ISO 15236-1 preview PDF and ISO OBP listings for the series.
-
Tension calculation principles for commissioning: Rulmeca’s technical article.
Further reading on BisonConvey
-
For splice prep and changeout context, see How to Change a Conveyor Belt — Steps and QA.
-
For downstream effects of poor cuts and splices on tracking, see How to Fix Conveyor Belt Misalignment.
-
For belt selection fundamentals and when EP vs steel cord makes sense, see Ultimate Guide: Mining Conveyor Belt Selection.
Conclusion
Square, safe cuts start with energy control and restraint, not the blade. Choose tools that match your belt construction and thickness, use a reliable squaring method, and verify the result before any splice work begins. Train operators on the specific cutter you’ve specified, maintain guards and blades, and document pre- and post-cut checks. Do that, and you’ll protect splice strength, cleaner compatibility, and uptime.
If you’re planning a belt changeout or upgrade and need help specifying belts, idlers, or pulleys that work with your maintenance practices, talk to BisonConvey for practical, engineering-led support: https://bisonconvey.com