
Belt conveyor idlers: definition and functional importance
What conveyor idlers do, common types, and why idler condition drives tracking, power draw, belt life, and safety in mining.
If you run conveyors in a mine, you already know the uncomfortable truth: the smallest components can set the availability ceiling. Idlers are one of those components. They’re “just rollers” until one seizes, builds up, or gets knocked out of square—and then you’re chasing mistracking, belt edge damage, spillage, and unplanned downtime.
This article defines belt conveyor idlers, explains what they do mechanically, and shows why their condition is tied to belt life, power draw, and safety.
What are belt conveyor idlers?
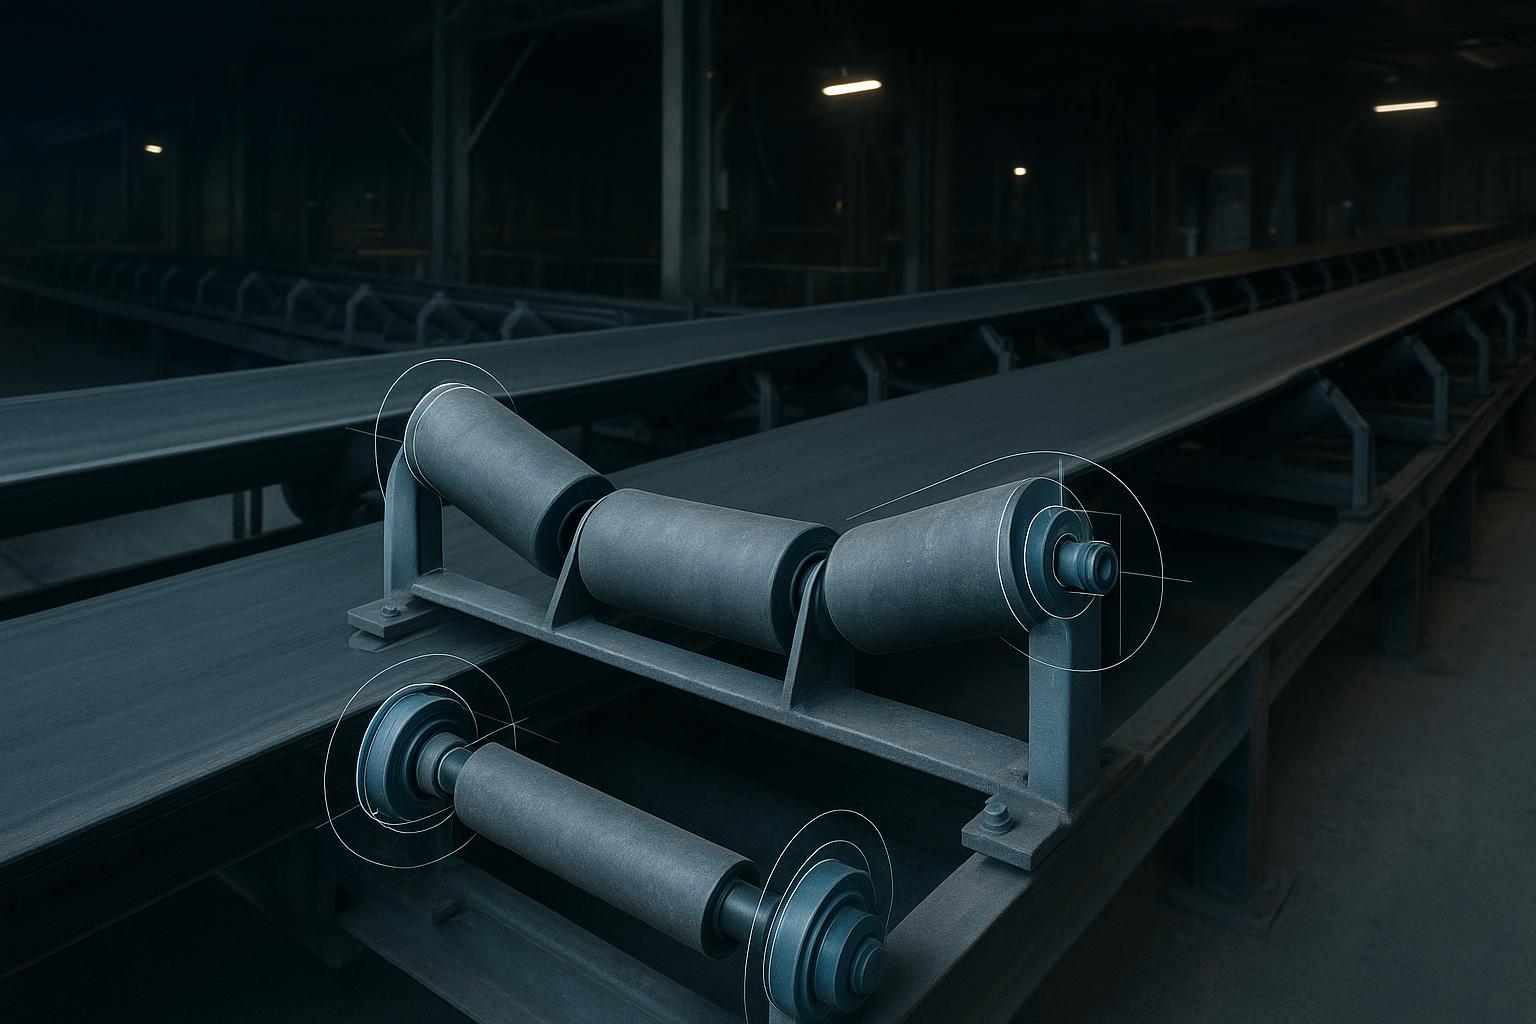
Belt conveyor idlers are free-rolling rollers (or roller sets) with bearings, mounted in frames across the conveyor structure, that support and shape the belt while it carries material and returns empty.
Martin Engineering describes idlers as the primary belt support mechanism: rollers with bearings mounted to frameworks across the conveyor stringers, designed to support/shape the belt and help minimize the power needed to move material (see Martin Engineering’s explanation of conveyor belt support with idlers).
Idler vs pulley (don’t mix them up)
Idlers roll freely and primarily support and guide the belt.
Pulleys are larger diameter rotating drums at the head/tail (and sometimes snub/bend locations) that drive the belt or change its direction.
That distinction matters because most “mystery” conveyor problems are load/support/tracking issues (idler-zone problems) rather than drive problems.
Why idlers matter more than their size suggests
Idlers influence four outcomes maintenance managers care about:
1) Belt tracking and belt life
Idlers create the belt’s running geometry. If frames are skewed, rolls are dragging, or carryback builds up on return rolls, you effectively create one-sided friction that steers the belt.
BisonConvey’s guide on conveyor belt misalignment and how to fix it calls out several idler-driven causes that show up in the field:
A single skewed idler frame can steer the belt off-center for a long distance.
Seized or dragging rollers behave like a brake on one side.
Carryback build-up on return idlers creates friction ridges that steer the belt.
2) Containment (spillage and carryback)
Correct troughing geometry and stable belt support help keep material in the belt’s “cross-section.” When idlers are mis-specified (wrong trough angle for the load and belt), poorly spaced, or heavily built up, you’ll see more:
spillage at skirtboards and along the stringers
carryback that migrates to the return run (and then back into idlers)
3) Power draw and energy efficiency (rolling resistance)
Idlers don’t just support the belt—they’re a major contributor to running resistance.
From an engineering standpoint, the resistance you feel in an idler roll comes largely from bearing friction, lubricant drag, and seal friction. Those contributors are discussed in ASME’s paper on rotating resistance of belt conveyor idler rolls.
What changes in real operations:
A roll that’s contaminated, misaligned, or partially seized adds drag.
Drag increases belt tension demand and shows up as higher power consumption.
Drag also turns into heat and accelerated belt cover wear.
You don’t need perfect instrumentation to care about this. If your team is constantly replacing “mystery hot” rollers or fighting chronic tracking, your idler rolling resistance is telling you something.
4) Safety (pinch points and fire risk)
Two idler-related hazards deserve explicit attention:
Pinch points: the belt-to-roller nip can grab tools, gloves, or clothing.
Heat/fire risk: a seized roller can generate frictional heat against the belt and any dust/spillage present.
CCOHS’ conveyor safety guidance is blunt about what to do: guard pinch points on rollers and wheels and lock out the conveyor before you clear jams or perform servicing.
⚠️ Warning: If you’re inspecting a suspected seized roller, treat it as both a pinch-point hazard and a potential ignition source. Follow site LOTO and guarding requirements before hands-on checks.
Conveyor idler types (and where each one belongs)
Most mining belt conveyors use a mix of these idler sets. The “functional importance” is really about placing each type where it solves the right load and tracking problem.
Carrying idlers (troughing idlers)
Carrying (troughing) idlers sit on the carrying run and shape the belt into a trough for capacity and containment. The typical station is a three-roll set (one center roll plus two wing rolls). Some applications use five-roll sets for load distribution.
Where they matter most:
long, heavily loaded carries
any area where spillage is expensive (cleanup labor, equipment damage, slip hazards)
Impact idlers (load zone)
Impact idlers are installed under loading zones where lumps and drop height create high impact energy. Their job is to absorb shock and protect the belt carcass and the supporting structure.
Good practice is to treat impact idlers as part of the load-zone system, not an isolated “upgrade.” If the chute is turbulent or off-center, impact idlers won’t save you from mistracking.
Return idlers (return run)
Return idlers support the empty belt on its return path.
In mining, the return run is where carryback and buildup quietly destroy reliability. If return idlers start to “cone” with material, you can create a steering effect and send the belt into the structure.
Common configurations include:
flat return (single roll)
V-return (two rolls forming a shallow V) when you need added stability
Training (self-aligning) idlers
Training idlers are designed to help correct belt drift. They can be useful on long runs, but they’re not a substitute for:
squared frames
centered loading
clean return run
healthy pulleys and belt splice geometry
As BisonConvey notes in its misalignment guide, training idlers help stabilize slow drift after you correct structural anchors—they shouldn’t be used to mask root causes.
Transition idlers
Transition idlers sit near the head and tail where the belt is changing from flat-to-trough or trough-to-flat. Their job is to control belt edge stresses and help the belt change shape gradually.
If you’ve ever seen chronic edge cracking, splice issues, or strange cover wear near a pulley, transition geometry is a prime suspect.
What idler failure looks like (and why it cascades)
Idler issues rarely stay local. A bad roll changes forces, and those forces show up somewhere else.
Typical field failures include:
seized/dragging rollers (heat, noise, belt scuffing)
bearing/seal contamination (rough rotation, growling, early failure)
shell wear/corrosion (diameter loss, imbalance, accelerated bearing load)
carryback build-up on return rolls (tracking drift, extra drag)
out-of-square frames after maintenance (mistracking that appears “random”)
Conveyor idler maintenance: a practical inspection checklist
Use this as a “first response” before you start making tracking adjustments.
Look and listen: unusual noise, vibration, belt edge contact, dust plumes at one station.
Find the drag: identify any roll that isn’t turning freely (or is hotter than peers).
Check the frame: verify the idler set is square to the belt line—especially after recent work.
Clean the return run: remove carryback build-up on return idlers before adjusting alignment.
Verify upstream causes: off-center loading and chute turbulence can create symptoms that no amount of idler “tuning” fixes.
If you want a deeper troubleshooting path focused on idlers, start with BisonConvey’s walkthrough of common idler-related causes of belt mistracking (see the earlier link to that guide) and how to address them in a stable order.
A selection/spec checklist (what to verify before you buy idlers)
When you’re specifying idlers for a mine, you’re really specifying risk: contamination risk, impact risk, and misalignment risk.
At minimum, confirm these inputs with engineering, procurement, and HSE:
Conveyor zone: carrying / load zone / transition / return
Material conditions: abrasion level, moisture, corrosives, lump size, carryback tendency
Geometry: belt width, trough angle, transition distances
Duty expectations: operating hours, reliability targets, access constraints for replacement
Bearing + sealing strategy: contamination control is usually the dominant life limiter in mines
Maintainability: change-out method, spares strategy, and whether the vendor can supply consistent replacements over time
This is also where vendor consistency matters. Mixing idlers with different dimensional standards and performance characteristics can turn tracking into a permanent “tuning” job.
Next steps (if you want to reduce idler-driven downtime)
If you’re reviewing an idler package for a new conveyor or a reliability upgrade, BisonConvey can support a practical spec review—carrying vs impact vs return needs, contamination risks, and the inspection points your team should watch during commissioning.
Start by documenting (1) your belt width + speed, (2) load-zone drop conditions, and (3) the top 2 failure modes you see today (seizure, carryback build-up, frame shifts, etc.). That short list is often enough to identify whether you have a sealing problem, a load-zone problem, or a structural alignment problem.