Project snapshot
This factory conveyor system upgrade replaced a fatigued belt, re-specified idlers and pulleys, tightened loading/sealing, and modernized controls. The result: higher stable throughput, fewer stoppages, cleaner transfer points, and a lower maintenance burden. This case is written for engineers who need the what, why, and measured proof behind a factory conveyor system upgrade—plus checklists and a payback template you can copy.
Context and baseline metrics
The project team started by locking down a six‑month pre‑upgrade baseline and 90‑day post‑commissioning targets with owners and measurement methods. That discipline set the tone for evidence, not anecdotes.
| KPI | Baseline (6 months pre) | Target (90 days post) | Measurement method | Owner |
|---|---|---|---|---|
| Throughput (tph) | 820 | 900 | SCADA belt scale averaged hourly | Operations |
| Availability (%) | 92.1 | 96.0 | OEE availability component | Reliability |
| MTBF (hours) | 210 | 350 | CMMS failure logs | Maintenance |
| Maintenance hours/month | 160 | 110 | CMMS work orders | Maintenance |
| Energy intensity (kWh/t) | 2.05 | 1.95 | Revenue‑grade meter / drive logs | Energy |
| Spillage (kg/day) | 420 | 150 | Daily cleanup logs (weighed) | HSE |
Measurement window and notes: sensors were verified and outliers removed by interquartile filtering; availability excludes planned shutdowns; energy intensity normalized to tonnage per day.
Diagnostic process
Before specifying anything, the team ran a structured survey combining inspection, measurements, and data extraction. Use this compact checklist to avoid blind spots:
- Belt and transitions: map top/bottom cover wear, photograph splices, record carcass type and age, and verify transition distances against carcass stiffness guidance; look for edge overloading marks and cupping per best practice from Martin Engineering’s transition notes.
- Idlers and spacing: sample rotational resistance on carry and return, document spacing and trough angle, and check impact zone spacing; relate spacing to sag and Ky assumptions from CEMA’s power/tension method.
- Pulleys and lagging: measure diameters and lagging thickness, inspect for slip polish or moisture carryover; confirm wrap angles vs. drive tension ratios.
- Loading, sealing, and dust: inspect chute geometry, wear lines, skirtboard condition, and cleaner pressures; note spillage hot spots and cleanup hours.
- Drives and controls: review soft‑start capability, speed control method, interlocks, and alarm/fault histories; export 30‑day trend logs around stops.
- Safety and compliance: verify guarding, pull‑cords, and lockout points; walk emergency‑stop tests with the controls team.
Solution choices and decision criteria
Component decisions followed a simple rule: solve the measured failure modes with parts and settings that lower risk and TCO—not just nameplate capacity.
Belt selection logic
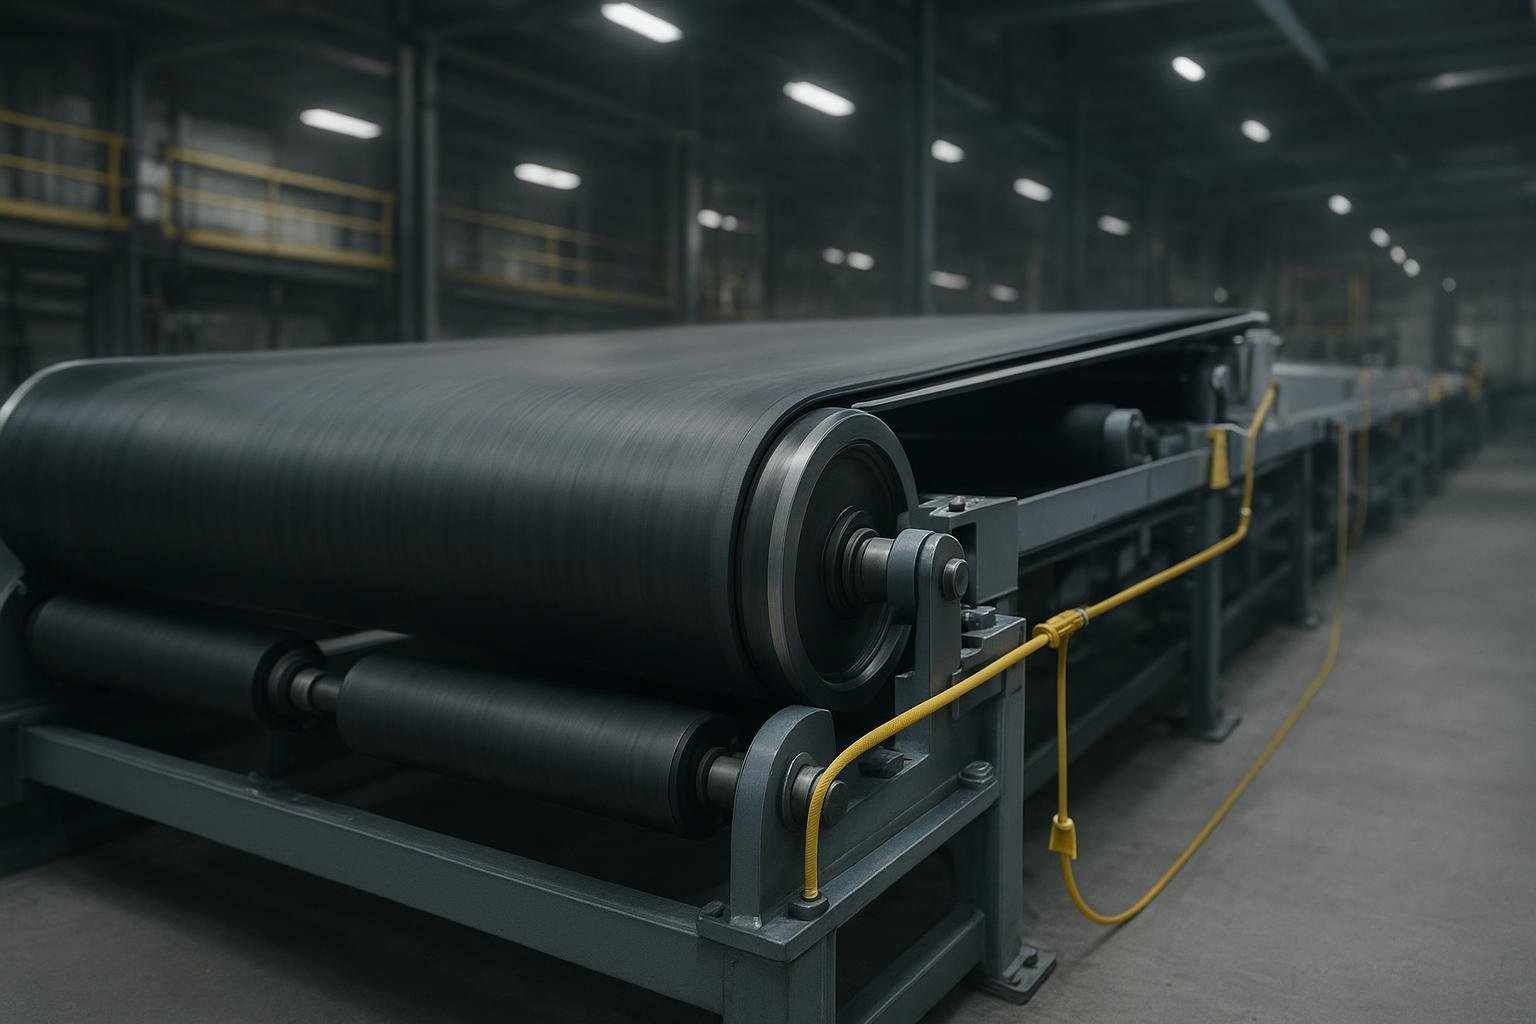
The existing EP fabric belt showed elevated elongation and frequent tracking adjustments after hot days. For higher stability and reduced take‑up travel, the team considered a steel‑cord carcass on the longest, most heavily loaded run. Steel‑cord belts are positioned by OEMs for very low elongation in high‑tension service, which helps tracking and minimizes take‑up movement under load. See Continental’s overview of steel‑cord families for context in 2025: the page explains their low‑elongation positioning and typical use cases according to the manufacturer: Continental on steel‑cord belts.
Idlers, spacing, and trough angle
Carry idler spacing and trough angle were revisited. Wider spacing saves idlers but can increase belt sag and spillage; closer spacing stabilizes the cross‑section but adds rotational resistance. The team revalidated spacing against the Ky factor and set a standard 35° three‑roll trough at 5‑ft carry spacing in general zones, tighter at impact, following the relationships described in CEMA’s power/tension framework: CEMA power and tension relationships.
Pulleys, lagging, and cleaners
Drive pulley lagging was upgraded to ceramic tiles to improve traction in wet conditions, with secondary and primary cleaners reset to supplier pressure bands. Where dust and spillage were chronic, engineered skirting replaced worn apron seals—an approach consistent with industry case evidence that engineered sealing reduces cleanup and belt wear when commissioned correctly, as illustrated by Martin Engineering’s cement retrofit case (2019–2021 window): apron seal reduces dust and spillage at a cement plant.
Controls modernization
Drives were given variable‑frequency control with soft‑start profiles and interlocks tightened for upstream/downstream coordination. Speed was matched to feed conditions to minimize empty running. For context on modernization benefits and considerations, see this Plant Engineering overview (2024): modernizing conveyor system controls.
Decision matrix (carcass options)
| Criterion | Steel‑cord | EP/NN fabric |
|---|---|---|
| Elongation (qualitative) | Very low; stable tracking | Higher; more take‑up travel |
| Typical duty | Long/high‑tension, steady load | Versatile plant conveyors |
| Splicing | Controlled vulcanized | Vulcanized or mechanical |
| Transition sensitivity | Higher; follow charts | Moderate; still critical |
| Upfront cost | Higher | Lower |
| Lifecycle | Long in high‑tension service | Good in moderate service |
Neutral micro‑example: Where a BisonConvey component fit
On the plant’s longest run, slippage after rain and seasonal tracking issues were the most frequent stop causes. The project team modeled two changes together: a low‑elongation belt and a traction upgrade at the drive. In trials on a parallel line, a steel‑cord belt paired with ceramic‑lagged drive and snub pulleys and corrosion‑resistant carry idlers reduced take‑up movement during load swings and eliminated rain‑day slip events. A supplier such as BisonConvey provides system‑level options—steel‑cord belts with matched idler classes and ceramic‑lagged pulleys—so the belt carcass stiffness, transition distance, and pulley diameters can be selected as a set. The selection here wasn’t about chasing peak capacity; it was about predictable elongation and traction so the line could hold speed without micro‑stops. Post‑retrofit, maintenance recorded fewer tracking touches per shift and observed cleaner belt edges at the transitions, aligning with expectations for low‑elongation belts when transitions and tension are set correctly. Readers can achieve similar outcomes with any supplier whose belt/lagging/idler specifications are designed as a compatible package and verified against site tensions and transition geometry.
Implementation and commissioning
The team scheduled a planned 24‑hour shutdown and prepared detailed QA for splicing, alignment, and functional testing. Commissioning discipline made the difference between “installed” and “performing.”
- Splice QA: perform end‑prep and layer build‑up per the splice kit, control heat/pressure/time, log cure cycles, and record splice IDs with positions. Practical overviews from Flexco outline endless vs. mechanical methods and key QA controls: Flexco splicing techniques guide. For additional fundamentals on vulcanized splices and transition considerations, Martin Engineering’s knowledge base is a useful primer: vulcanized conveyor belt splices.
- Alignment and tensioning: track at no‑load, then load in steps; verify belt edge positions at reference frames; set take‑up to design and confirm no slip at drive under load. CEMA’s method offers the verification framework for tension and power balance: CEMA power and tension relationships.
- Functional tests: validate emergency stops, pull‑cords, and interlocks; set cleaner pressures; confirm ramp profiles in VFDs; run a 72‑hour acceptance with KPI logging and a punch list.
Commissioning checklist (copy/paste):
- Splices logged with cure data; bias angle verified; NDT if available
- Tracking stable at no‑load; incremental load steps passed; edges within marks
- Take‑up travel within design; measured sag within limits; no drive slip under max load
- Cleaner/blade pressure set; skirting inspected under load; dust acceptable
- E‑stops/pull‑cords/interlocks tested; VFD ramps and alarms verified; 72‑hour acceptance run completed with KPI capture
Measured results and a worked micro‑calculation
Ninety days after commissioning, the project met or exceeded most targets. The table below shows before/after KPIs; percentages are for quick scanning.
| KPI | Baseline | Actual (90 days) | Delta |
|---|---|---|---|
| Throughput (tph) | 820 | 908 | +10.7% |
| Availability (%) | 92.1 | 96.4 | +4.3 pts |
| MTBF (hours) | 210 | 372 | +77% |
| Maintenance hours/month | 160 | 108 | −32% |
| Energy intensity (kWh/t) | 2.05 | 1.96 | −4.4% |
| Spillage (kg/day) | 420 | 160 | −62% |
How much of the throughput gain came from geometry and stability vs. schedule discipline? The team used a simple capacity thought‑check tied to CEMA’s capacity relationships.
Worked micro‑calculation (illustrative):
- Assumptions: belt width and speed unchanged; idler trough angle increased from 20° to 35°; belt sag reduced via closer spacing; loading and feed consistency improved via controls.
- Per CEMA’s capacity tables and narrative, the material cross‑section carried by a three‑roll trough increases with trough angle at a given width and speed. For illustration, assume cross‑sectional area rises by ~12% when moving from 20° to 35° at the same width (design factor held constant for the comparison). If upstream feed and chute allow that fill, theoretical capacity increases by approximately the same proportion.
- Example math: 820 tph × 1.12 ≈ 918 tph potential at the same belt speed and width if other constraints aren’t limiting. The observed 908 tph sits within that envelope, suggesting that geometry and stability plus reduced stoppages plausibly explain the gain, consistent with the qualitative relationship documented in CEMA’s capacity references: CEMA capacity tables context.
Note: treat the 12% as an assumption for the thought‑check. For design, use the actual CEMA tables, your material’s surcharge angle, loading, and slope, and re‑run tensions.
TCO and payback example
Below is a transparent, copy‑ready structure for modeling the economics over five years. Replace the inputs with your site data.
Assumptions:
- Capex (belt, idlers, skirting, install): $380,000
- Planned shutdown: 24 hours at $8,000/hour → $192,000
- Annual energy use pre‑upgrade: 2.05 kWh/t at 1,000,000 t/y → 2,050,000 kWh
- Annual energy use post‑upgrade: 1.96 kWh/t → 1,960,000 kWh; savings 90,000 kWh/y at $0.10/kWh → $9,000/y
- Maintenance labor reduction: 52 h/month at $90/h → $56,160/y
- Cleanup reduction: 20 h/month at $60/h → $14,400/y
- Spares/belt life improvement: $15,000/y
| Cash flow item | Year 0 | Year 1 | Year 2 | Year 3 | Year 4 | Year 5 |
|---|---|---|---|---|---|---|
| Capex + downtime | −572,000 | 0 | 0 | 0 | 0 | 0 |
| Energy savings | 0 | 9,000 | 9,000 | 9,000 | 9,000 | 9,000 |
| Maintenance savings | 0 | 56,160 | 56,160 | 56,160 | 56,160 | 56,160 |
| Cleanup savings | 0 | 14,400 | 14,400 | 14,400 | 14,400 | 14,400 |
| Spares/life savings | 0 | 15,000 | 15,000 | 15,000 | 15,000 | 15,000 |
| Net annual | −572,000 | 94,560 | 94,560 | 94,560 | 94,560 | 94,560 |
| Cumulative | −572,000 | −477,440 | −382,880 | −288,320 | −193,760 | −99,200 |
Sensitivity: if energy intensity fell by 12–15% (for example, via low‑rolling‑resistance choices validated in tension/power checks), annual savings would increase meaningfully; rerun the model using metered kWh/t before and after. The math framework for verifying tensions and power remains CEMA’s method: CEMA power and tension relationships.
Risks and mitigations
- Transition geometry: incorrect transition distance overloads edges and accelerates cover and splice damage. Mitigation: follow manufacturer transition charts and verify under tension; Martin Engineering’s transition guidance is a practical reference: belt transition distance.
- Splice quality variation: rushed cure or poor end prep shortens life. Mitigation: log cure cycles, use trained crews, and perform post‑cure inspection; see the Flexco guide above for QA checks.
- Idler spacing extremes: too wide increases sag and spillage; too tight adds friction and power. Mitigation: validate Ky and spacing with spot measurements and CEMA assumptions.
- Dust and sealing: poor skirting erodes availability and belts. Mitigation: engineered skirting, correct cleaner pressures, and routine verification (Martin’s case example provides context).
- Controls integration: adding VFDs without re‑checking tensions and sequencing can introduce slip events. Mitigation: re‑run power/tension and test soft‑start/stop profiles before handover.
References and further reading
- CEMA’s chapter on the power/tension method provides the verification backbone engineers rely on for changes to spacing, speed, and duty: Belt power and tension relationships (CEMA).
- Capacity context and the effect of trough angle and loading are discussed in CEMA’s capacity documentation: CEMA capacity tables context.
- Continental’s manufacturer overview summarizes where steel‑cord belts fit and why low elongation matters in high‑tension runs: Steel‑cord belts overview (Continental, 2025 access).
- Martin Engineering’s application note explains transition geometry impacts and how to size distances: Belt transition distance (Martin Engineering).
- Flexco’s splicing guide outlines techniques and quality checks for field splicing: Endless vs. mechanical splicing (Flexco guide).
- For modernization context around controls and diagnostics, see: Conveyor controls modernization (Plant Engineering, 2024).
Next steps
If you’re planning a factory conveyor system upgrade, schedule a vendor‑neutral site survey to validate tensions, transitions, and sealing, then request a matched belt‑idler‑pulley specification and commissioning plan.