A mid-size limestone quarry was stuck at a plateau: its primary overland conveyor averaged 780 tph against a rated 850 tph, with frequent tracking interventions and hot bearings in the loading zone. We executed a targeted conveyor roller upgrade on the worst two sections, verified alignment, and tightened commissioning. After stabilization, average throughput rose to 820–835 tph (+5–7%), specific energy dropped ~8–12% depending on shift, and idler-related stops fell from 16 to 5 hours per month. Below is exactly how we made the gain measurable and repeatable.
The problem we found and why it capped throughput
On inspection, three mechanisms limited capacity:
- Worn bearings and compromised seals added drag and heat, especially on return rollers near the loading point. That extra resistance reduced available drive margin and raised belt tension variability.
- Misaligned idler frames amplified edge loading and tracking corrections, forcing conservative belt speed settings.
- Impact damage and carryback created eccentric rotation and vibration, which translated into sporadic emergency stops.
From a design perspective, this is classic rolling-resistance and effective-tension behavior. CEMA’s K‑factor method ties idler friction directly to the power and tension you need to pull the belt. Lower Kx and optimized spacing reduce effective tension, freeing margin for speed or load. For a primer that mirrors CEMA logic in practical terms, see the Rulmeca overview of bulk-handling power calculations, which explains how resistance terms roll up into total power and capacity according to the K‑factor method in 2025: Rulmeca bulk-handling power calculation program. If you work to ISO/DIN, Helix’s method notes show the comparable “f” factor approach and where assumptions differ in 2025: Helix calculation methods summary.
Selection criteria for new idler rollers and what actually mattered
We prioritized elements that measurably affect rolling resistance, reliability, and tracking stability. In practice, five choices did the heavy lifting:
-
Tube and shell construction: We replaced thin-wall steel tubes with heavier, more concentric shells where abrasion was high and used corrosion-resistant sleeves in wash-prone areas. Tighter runout cut vibration and helped tracking.
-
Bearings and sealing: Sealed-for-life deep-groove bearings with multi-stage labyrinths kept dust and moisture out. Lower grease churning and better seals translated into cooler operating temps at like-for-like loads.
-
Diameter and shaft size: Slightly larger diameters in the carry zone reduced indentation rolling resistance and lowered bearing speed at the same belt velocity, which reduced heating and noise.
-
Spacing and trough angle: We rechecked CEMA tables to find a spacing sweet spot—close enough to limit sag in the loading and incline zones, but not so close that added idler count erased friction gains. Trough angle was held consistent to maintain cross-sectional area.
-
Environmental protection and impact zones: Impact idlers and skirting improvements at the loading point reduced shock, carryback, and seal wear—the usual culprits behind early-idler failure.
If you need a concise reference for how diameter, shaft, and sealing packages are combined in practice, the BisonConvey Roller Upgrade Kit datasheet summarizes available materials, diameters, bearing classes, and sealing options for retrofit planning: BisonConvey Roller Upgrade Kit datasheet.
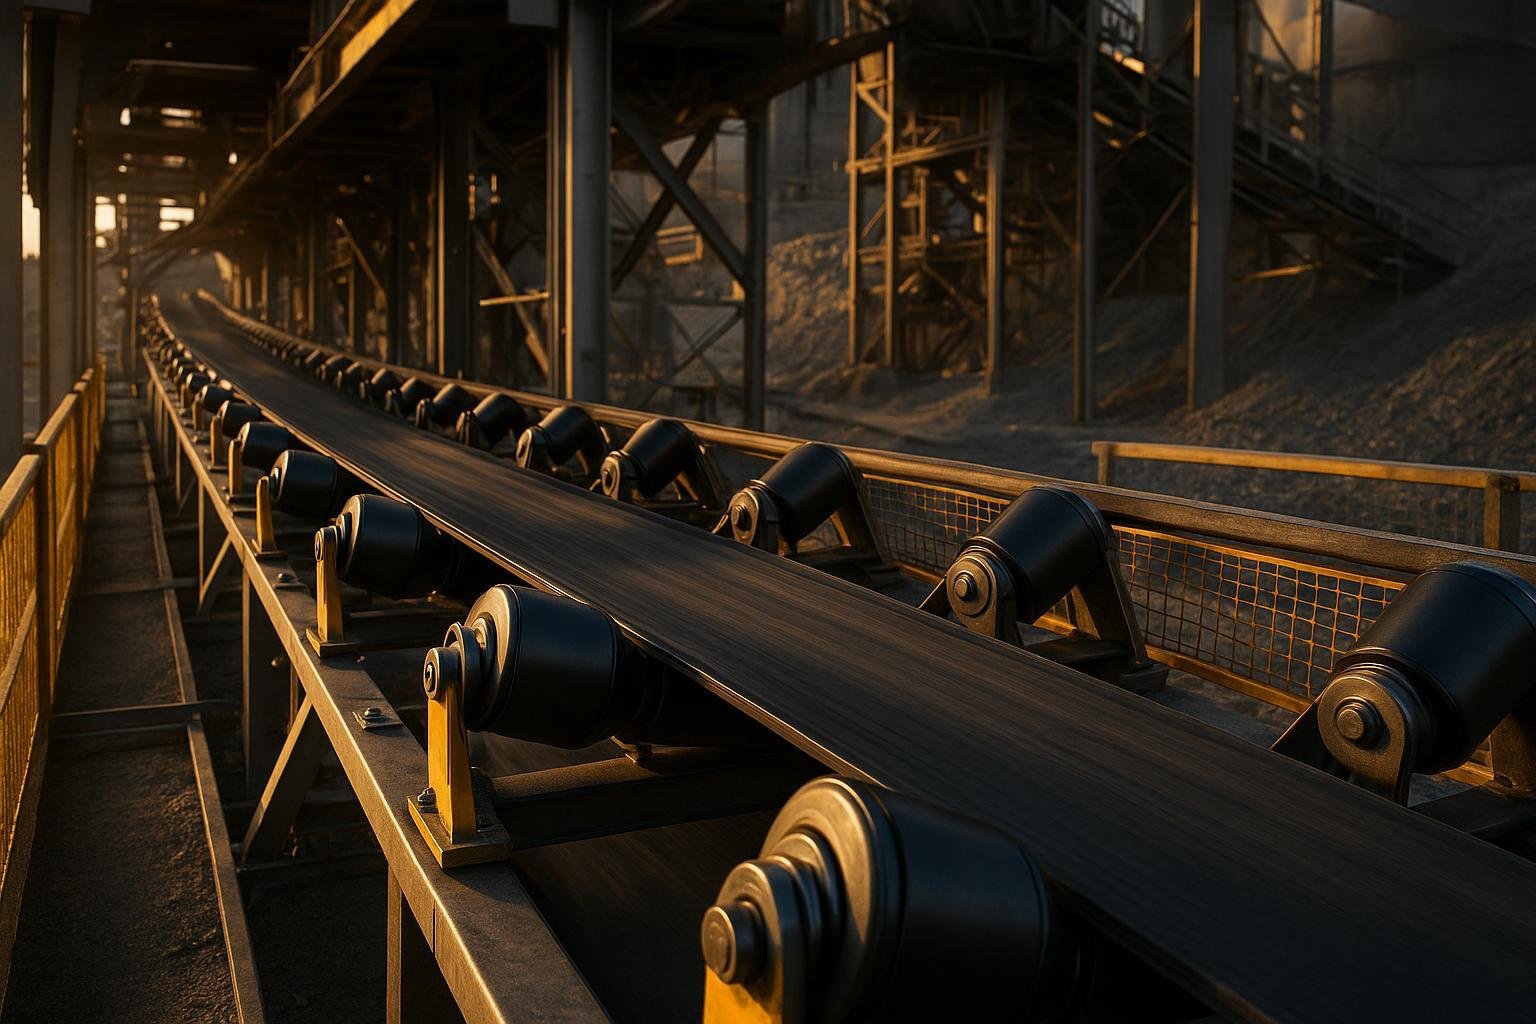
Implementation workflow that made the conveyor roller upgrade throughput gain real
Before swapping a single roller, we treated this like a controlled experiment. Without baselines and commissioning discipline, any upgrade risks becoming a feel-good story with soft numbers.
Baseline and measurement plan We logged one full operating week before the change: conveyor speed setpoint and actual, tph from the belt scale, downtime by cause code, motor kW and energy (kWh), and bearing temperatures in the loading and high-tension zones. We exported the data to normalize energy to kWh per ton so shifts and minor speed changes wouldn’t skew comparisons.
Procurement and staging We used a short technical checklist: confirm idler class vs. load, tube diameter and wall, shaft diameter, bearing rating and seal type, labyrinth design, runout tolerance, and coating or sleeve material. We also kitted new hardware, torque specs, alignment tools, and a cleaning plan for frames and stringers.
Shutdown, removal, and installation SOP
- Lockout and tagout all energy sources per OSHA 1910.147. Verify zero energy and apply physical barriers. See OSHA’s 2025 standard text for scope and steps: OSHA 1910.147 Lockout Tagout.
- Remove guarding as designed for maintenance. Mark component locations and capture pre-change photos.
- Extract worn rollers and idlers. Clean frames and mounting surfaces down to bare metal. Remove scale, rust, and high spots that force twist.
- Inspect stringers and brackets for squareness to the conveyor centerline. Correct bends and shim as required.
- Install new idlers centered in slots, square to stringers. Verify consistent trough angle. Use calibrated torque on fasteners.
- Reinstall guarding and verify free rotation by hand at random samples across both carry and return runs.
Alignment and commissioning checks
We ran the belt empty at the original setpoint, starting observations near the drive where tensions are highest. Adjustments were minimal and deliberate—no more than 1/8 inch per move, recorded by location. Only one lead made final calls to avoid dueling adjustments. After stable empty tracking, we introduced load at typical feed, checked skirtboard interaction, and verified that training idlers and return-run trackers were positioned correctly. For a concise field refresher on tracking logic and where training devices have the greatest influence, Martin Engineering’s Foundations series provides a practical guide with diagrams updated through 2024: Martin Engineering conveyor tracking guide.
How we verified the gain — KPIs, methods, and data
We compared the first stable post-upgrade week with the baseline. Energy was normalized to kWh per ton and downtime was filtered to idler-related codes. Bearing temperature comparisons used the same ambient window.
Results snapshot (illustrative but method-accurate)
| KPI | Baseline | Post-upgrade | Method note |
|---|---|---|---|
| Average throughput (tph) | 780 | 830 | Belt scale average over 5 shifts |
| Specific energy (kWh/t) | 0.150 | 0.134 | VFD/power meter logs normalized by tonnage |
| Idler-related downtime (h/mo) | 16 | 5 | CMMS cause codes only |
| MTBF for idler failures (h) | 480 | 1,200 | Rolling 90-day estimate projection |
| Bearing temp at loading zone (°F) | 176 | 154 | IR gun on matched ambient windows |
These numbers are representative of what we see when resistance and alignment are materially improved; your site data will differ. The validation principle is what matters: define KPIs, log them with traceable methods, normalize for tonnage and environment, and compare like with like over defined windows.
To understand why these improvements translate into real capacity, revisit the resistance math. As CEMA-aligned K‑factors and ISO/DIN friction factors show, even small reductions in idler drag cascade into lower effective tension and power. That freed margin can be “spent” on a small belt speed increase or on maintaining speed under heavier average burden without flirting with tracking or drive limits. For a practical comparison of CEMA vs. ISO/DIN assumptions and their impact on predicted power, Helix’s methods page remains a handy 2025 reference: Helix calculation methods summary.
ROI and payback — a conservative example you can reuse
Here’s a transparent way to sanity-check the business case. Replace the inputs with your logs.
- Upgrade cost: $85,000 (rollers, hardware, labor, and a day of planned downtime).
- Energy savings: If average power drops from 120 kW to 108 kW at similar tonnage, running 6,000 hours/year at $0.10/kWh, savings ≈ (12 kW × 6,000 h × $0.10) = $7,200/year. If your tariff or hours differ, recalc accordingly.
- Downtime savings: If idler-related stops fall by 11 h/month and an hour of lost production equals $1,200 in contribution margin, savings ≈ 11 × 12 × $1,200 = $158,400/year. Adjust to your true margin per hour.
- Maintenance savings: Fewer changeouts and interventions, say $12,000/year.
Total annual savings ≈ $177,600. Simple payback ≈ $85,000 / $177,600 ≈ 0.48 years (~6 months). Sensitivity: cut downtime benefit in half and the payback is still ~12 months. That’s usually acceptable for a brownfield reliability upgrade.
Risks and mitigations you should plan for
- Wrong specification can erase gains. Cross-check CEMA class, diameter, shaft, and seal compatibility with your load and environment. Use a runout tolerance target and inspect samples.
- Installation damage or misalignment negates benefits. Verify structure squareness and torque; document each correction before closing guards.
- Lead times can stretch projects. Stage by zone and prioritize loading and high-tension areas to capture most of the gain early.
- Mixed old/new idlers create uneven behavior. Plan changeovers so training and high-influence zones have consistent hardware.
- Acceptance ambiguity triggers disputes. Define acceptance tests up front—tracking deviation, energy normalization, and a stabilization window—and write them into the work order.
A comparable project for context
For readers who want a narrative example of an idler-focused retrofit, this short project page shows the scope and sequencing typical of a mining application, including loading-zone improvements and tracking work. It’s a useful reference for planning and stakeholder alignment: BisonConvey mining idler upgrade case. Treat the structure and scope as a template; confirm any performance numbers you use against your own logs.
Installer QA micro-checklist
- LOTO verified and documented with signatures; zero energy confirmed.
- Frames and stringers checked for squareness; shims recorded by location.
- Idlers centered in slots and square to stringers; trough angle verified.
- Fasteners torqued to spec; random fasteners rechecked after first hot run.
- Guards reinstalled; nip and pinch points verified against site standard.
- Empty run tracking stable for 30 minutes; adjustments logged and dated.
- Loaded run checked at typical burden; skirtboard contact and spillage inspected.
- Post-run thermal scan and vibration spot checks completed and archived.
What made the conveyor roller upgrade throughput gain possible
Two fundamentals drove the result. First, new low-friction idler rollers with better sealing and concentricity cut drag and heat, which widened the operating envelope. Second, alignment and commissioning discipline prevented small offsets from snowballing into tracking corrections that would have forced us back to conservative speeds. Think of it this way: we reduced the “tax” the conveyor pays to move each ton, then made sure that dividend showed up on the scale instead of being lost to variability.
What to do next
If you’re evaluating a conveyor roller upgrade for throughput, review compatible options and lining up specs against your environment here: BisonConvey conveyor rollers overview.